


Content ITV PRO
This is Itvedant Content department
Secure Banking Data Model Implementation & Banking Business Rules Enforcement
Business Scenario
Welcome!
Today is your second day as a Database Developer at our digital banking company. We have received the next phase of the Banking Management Database System project from the client.
The client now wants us to implement a Secure Banking Data Model for the digital bank called BankingDB.
In this system, the bank staff should be able to:
Your task is to implement the secure banking database structure and enforce business rules using SQL DDL commands and constraints.
Pre-Lab Preparation
Topic : Crafting SQL Databases (DDL)
1) Types of Database Relationships
2) Concept of Entity Relationship Model (ERD)
3) Normalization and Denormalization
4) Types of DDL Commands
5) Types of Constraints
git pull origin branchNameGit Pull
Task 1: Identify Entities and Attributes
Before creating banking tables, we first identify the entities and their attributes present in the banking system.
An entity represents a real-world object or concept for which data needs to be stored inside the database. In a banking system, entities can include customers, accounts, transactions, branches, and loans.
Each entity contains a set of attributes that describe the details of that entity. Attributes become the columns of a table in the database.
What are Entities and attributes?
For example:
Identifying entities and attributes is one of the most important steps in database design because it helps developers:
Customers Entity
The Customers entity stores information related to bank customers.
1
| CustomerID | FirstName | LastName | Phone | Address | AccountCreationDate | |
|---|---|---|---|---|---|---|
Attributes:
CustomerID → Unique identification number for each customer
FirstName → Customer’s first name
LastName → Customer’s last name
Email → Customer’s email address
Phone → Customer’s contact number
Address → Residential address of the customer
AccountCreationDate → Date when the customer account was created
Activity
After going through BankingDB database list down the entities and attributes in the tabulated Format as shown Below.
| Entity | Attributes |
|---|---|
Task 2: Understand Database Relationships
By identifying entities and attributes before table creation, developers can design a well-structured and secure banking database system that efficiently stores and manages banking operations.
Before implementing the database, we must understand how tables are connected with each other.
Database relationships define how data in one table is linked to data in another table. These relationships help organize banking data, maintain consistency, reduce duplication, and enforce business rules.
Types of Database Relationships
One-to-One Relationship
In a One-to-One relationship, one record in a table is connected to only one record in another table.
Example:
One customer can have one KYC record.
Relationships are created using:
1
Benefit:
Helps store sensitive verification details separately and securely.
2
One-to-Many Relationship
In a One-to-Many relationship, one record in a table can be related to multiple records in another table.
Example:
One customer can have multiple bank accounts.
Benefit:
Allows a customer to manage different types of bank accounts efficiently.
3
Many-to-Many Relationship
In a Many-to-Many relationship, multiple records in one table can relate to multiple records in another table.
Example:
Multiple accounts can be managed across multiple branches.
Benefit:
Supports flexible and efficient banking operations across branches.
Understanding these relationships helps developers design a secure, organized, and efficient banking database system.
Task 3: Understand Entity Relationship Model (ERD)
An ERD (Entity Relationship Diagram) is a visual representation of the entities, attributes, and relationships present inside a database system.
ERDs help developers understand how different tables are connected and how data flows within the database. In a banking system, ERDs are very important because multiple entities such as customers, accounts, transactions, branches, and loans are interconnected.
Before creating tables in SQL, developers first design an ERD to organize the database structure properly and avoid redundancy or data inconsistency.
An ERD mainly consists of:
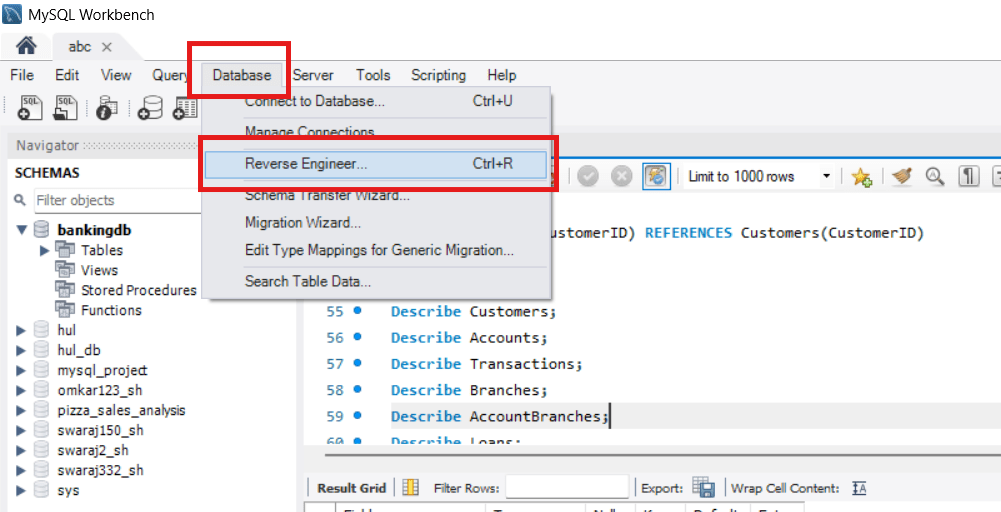
Lets make it in MySQL
Click on Database and then click Reverse Engineering
1
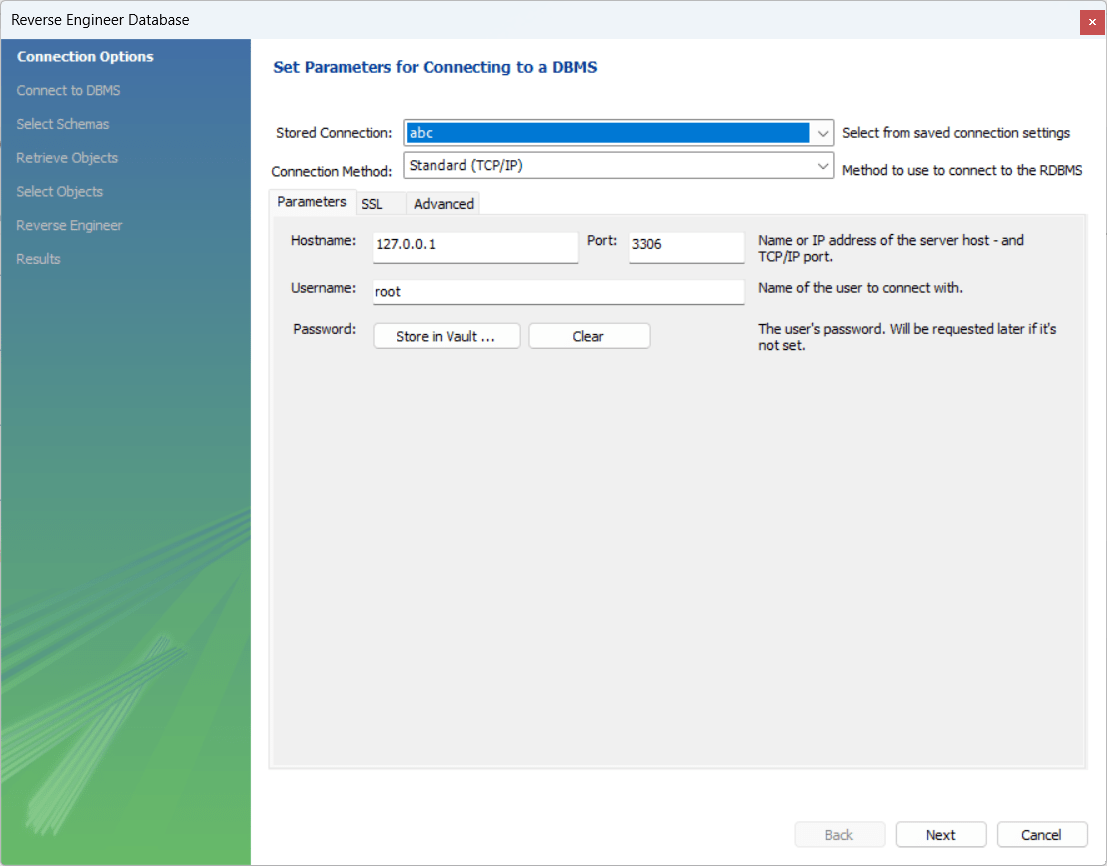
2
Select the Database connection and hit next
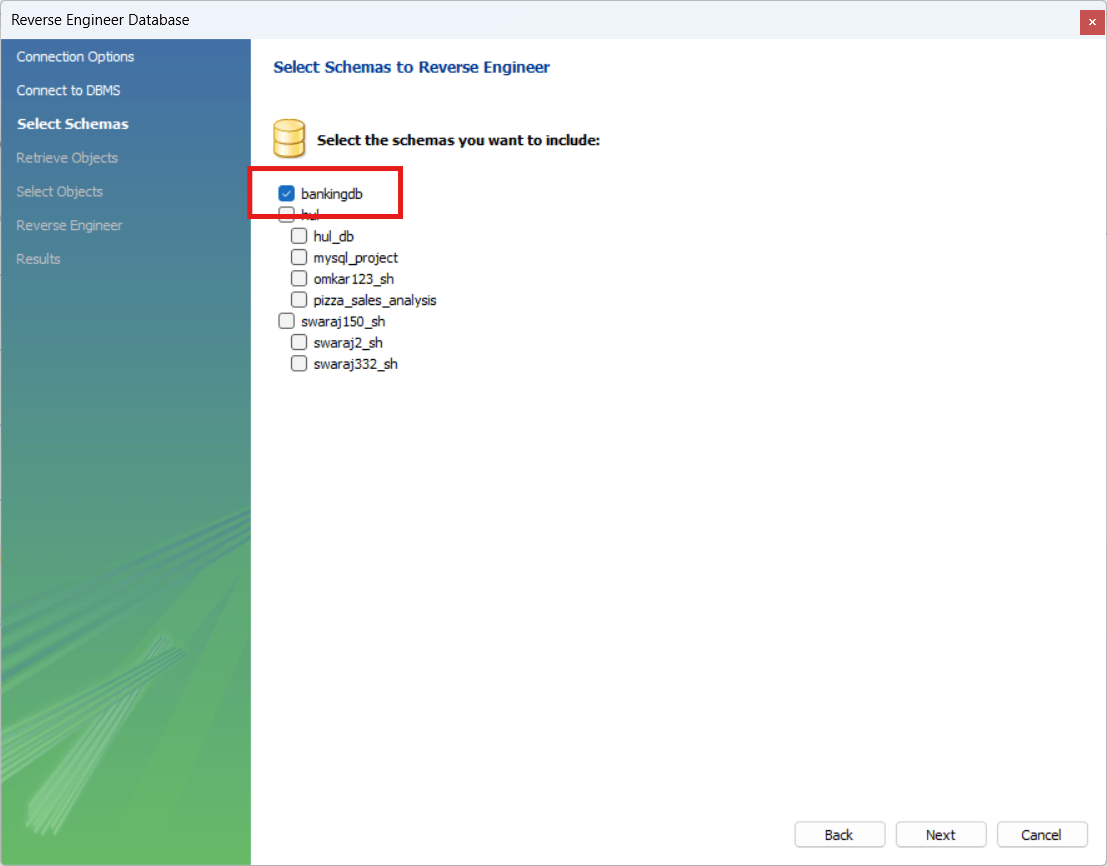
3
Select your Database (BankingDB) and hit next
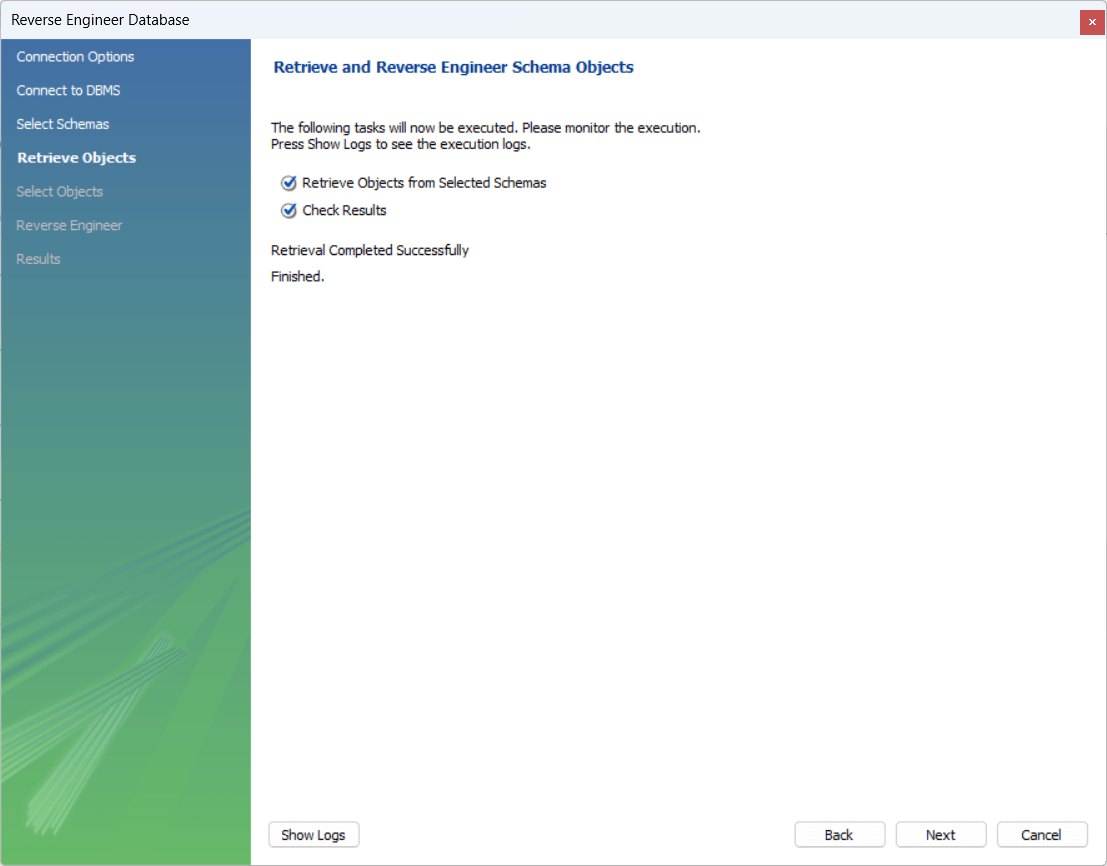
4
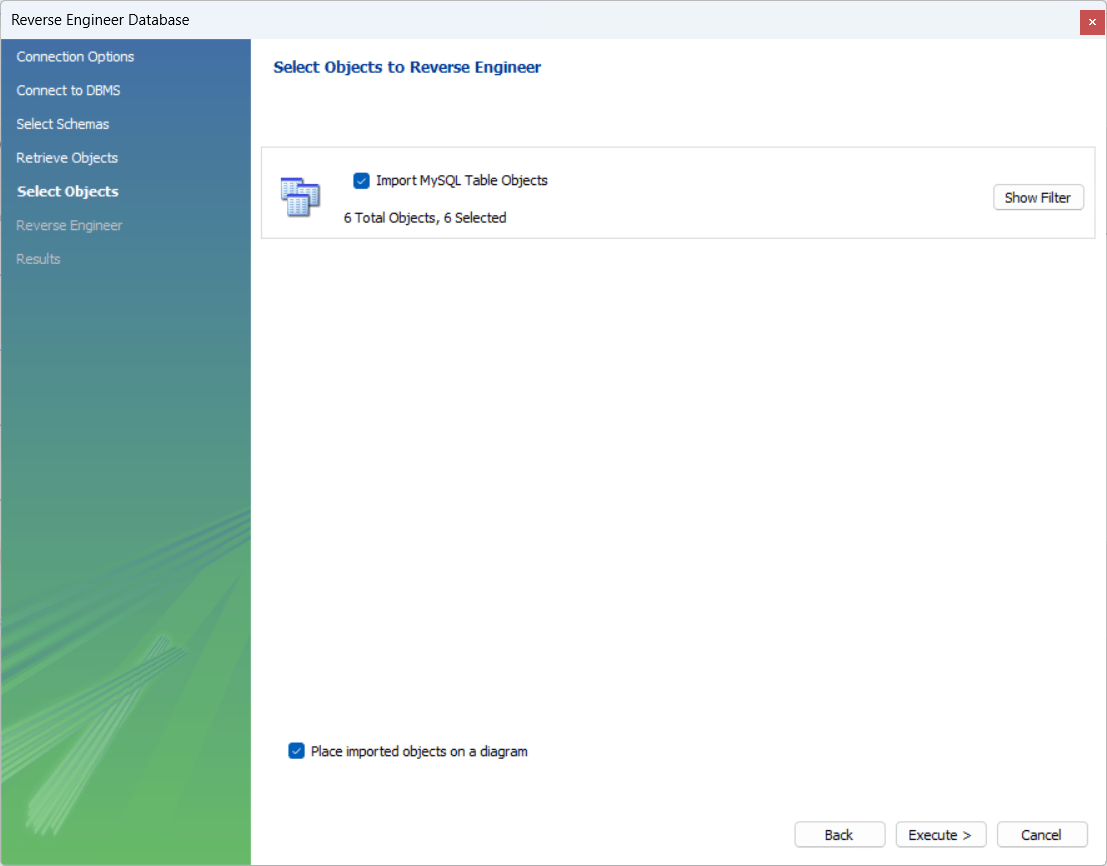
Select the object, hit next and then click finish
5
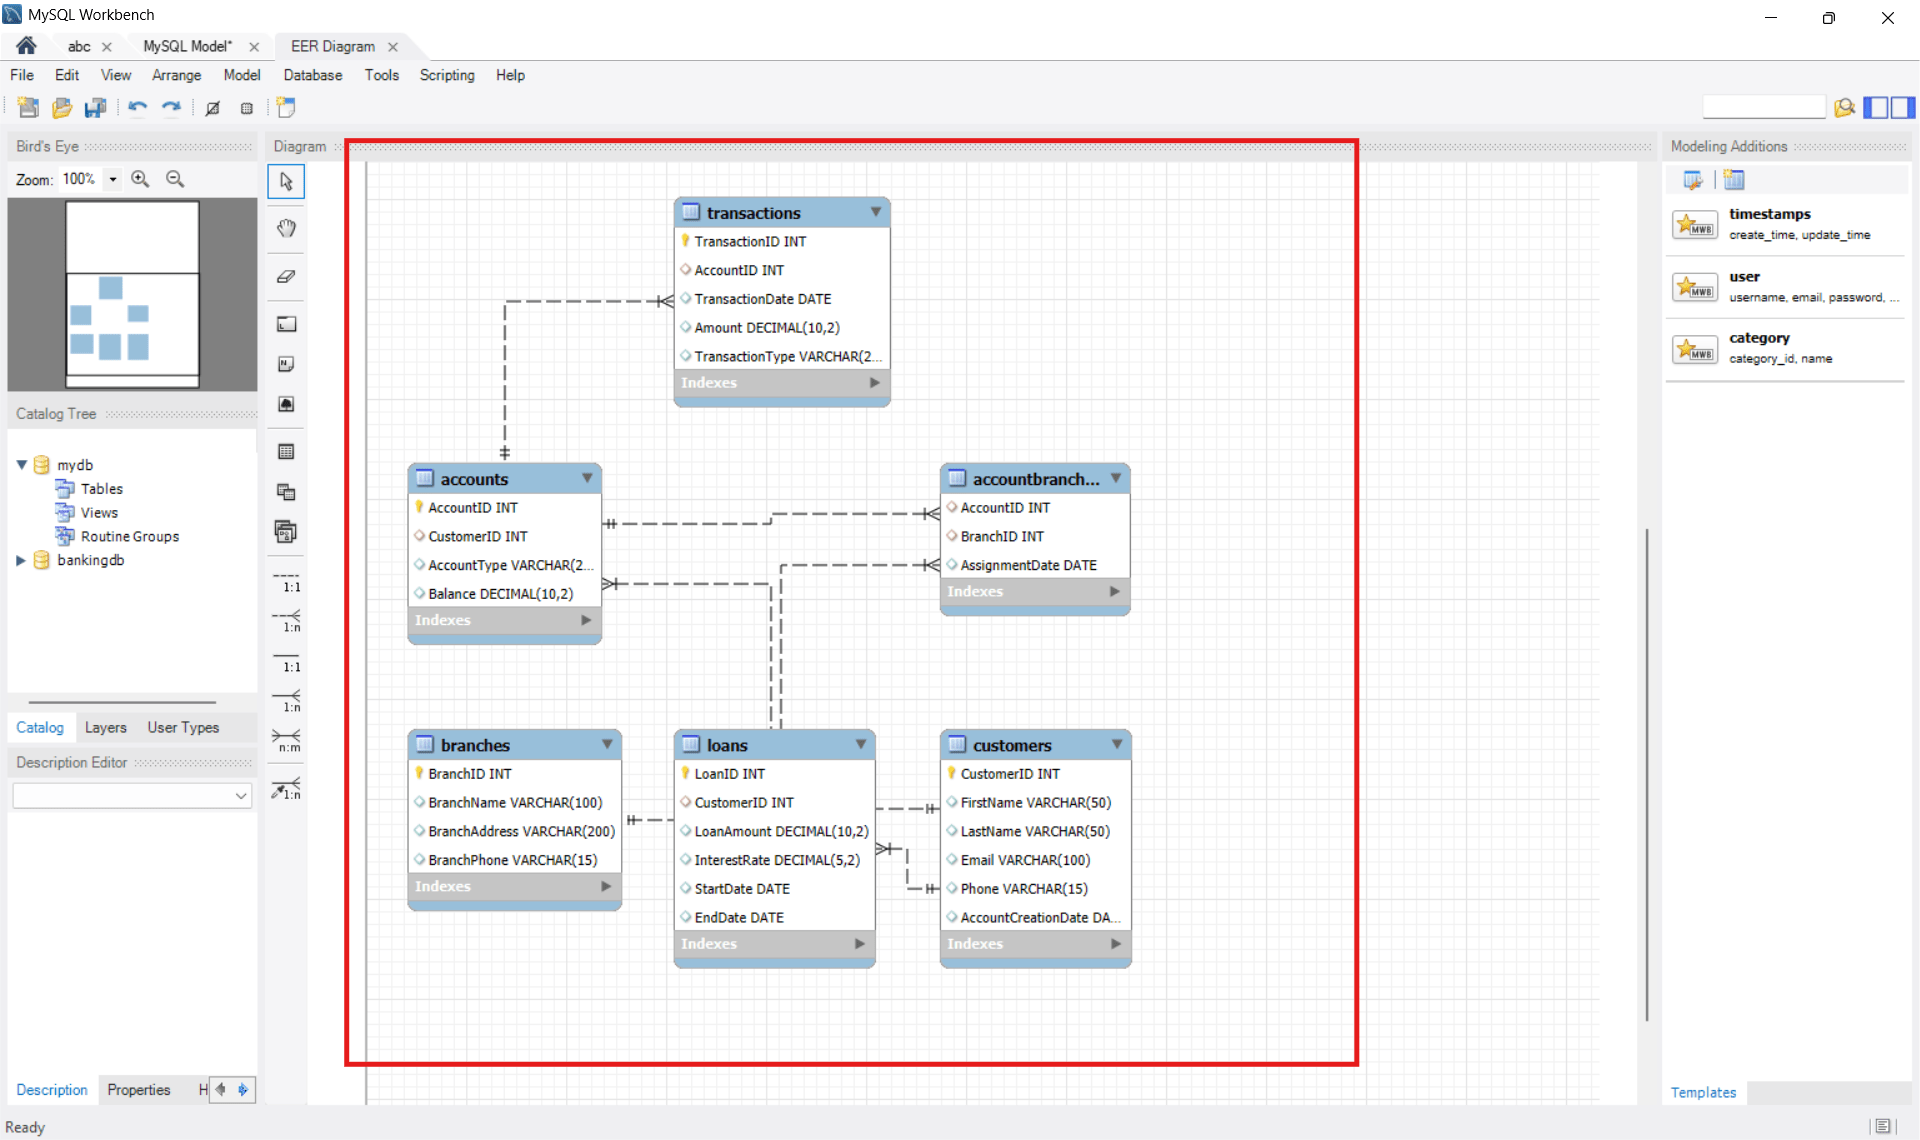
EER Diagram is generated
Explanation of Relationships
Customers → Accounts (One-to-Many)
One customer can have multiple bank accounts, such as savings or current accounts.
One customer → Many accounts
Each account belongs to one customer
This relationship is created using:
CustomerID as Primary Key in Customers table
CustomerID as Foreign Key in Accounts table
A
Accounts → Transactions (One-to-Many)
One bank account can have multiple transactions.
Examples
B
Each transaction is linked to only one account.
This relationship helps track account activity securely.
C
Customers → Loans (One-to-Many)
One customer can apply for multiple loans.
Examples:
Home Loan
Car Loan
Education Loan
Each loan belongs to one customer.
This helps banks manage loan records efficiently.
D
Accounts ↔ Branches (Many-to-Many)
Multiple accounts can be associated with multiple bank branches.
This relationship is managed using an intermediate table such as AccountBranches.
This structure helps support:
ERDs help developers:
This ERD helps developers understand the complete flow of banking data inside the system before implementing the database using SQL commands.
Task 4: Applying Normalization
Normalization helps organize data efficiently and reduces redundancy.
1
Types of Normalization:
First Normal Form (1NF)
Remove repeating groups
Store atomic values only
3
Third Normal Form (3NF)
Remove transitive dependency
2
Second Normal Form (2NF)
Remove partial dependency
Example:
Instead of storing customer details and transaction details in one table, separate tables are created:
Normalization improves the database by:
Normalization helps developers design a secure, organized, and efficient banking database system.
Task 5: Create Banking Tables using DDL Commands
Text
| Col 1 | Col 2 | Col 3 |
|---|---|---|
| Row 1 | ||
| Row 2 | ||
| Row 3 |
Formula
Profit = Revenue - Cost
Task 2: Create WireFrame
Now that you understand the requirements, don’t jump into coding yet. Before development, we always visualize the layout.
Now lets create a simple wireframe for the homepage.
A wireframe is like a layout plan of a house. Before building, you decide where rooms, doors, and windows will be placed.Similarly, a wireframe helps you plan where elements like headers, images, and buttons will appear on a webpage—before adding design or colours.
Task 3: Code Editor Installation
Good work on completing the planning phase.
Now we will start development. Before that, make sure your system is ready with the required tools.
In this step we will install the VS code editor that will help to Write code efficiently,Organize files , Run and test your application
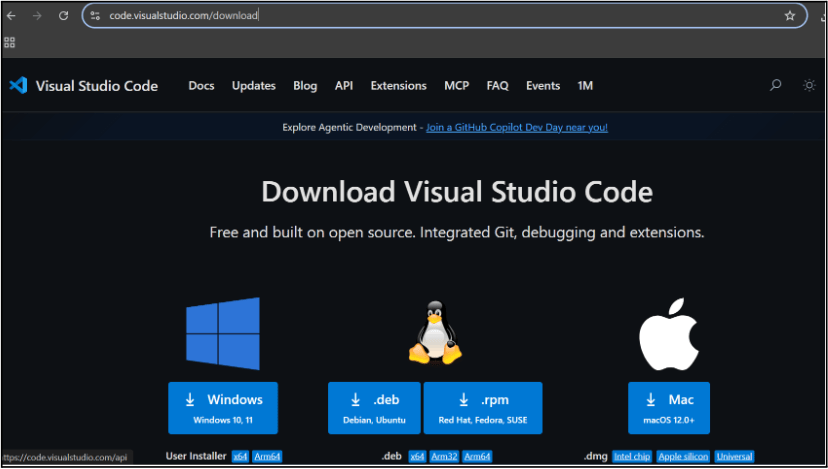
Go to the visual studio code official website
1
Click to download Homepage Wireframe : Homepage Wireframe
Choose your operating system(windows / Mac) and download the installation file.
Double click on the download app and Accept the agreement and click next
2
It is a long established fact that a reader will be distracted
b
Sub Steps
a
Double click on the download app and Accept the agreement and click next
public class MathSample {
    public static void main(String[] args) {
        int x = 10;
        int y = 20;
        int sum = x + y;

        System.out.println("The sum is: " + sum);
    }
}
public class MathSample {
public static void main(String[] args) {
int x = 10;
int y = 20;
int sum = x + y;
System.out.println("The sum is: " + sum);
}
}
public class MathSample {
public static void main(String[] args) {
int x = 10;
int y = 20;
int sum = x + y;
System.out.println("The sum is: " + sum);
}
}
Great job!
You have successfully completed your first lab on BiteBox Project Onboarding.
In this lab, you have: Understood the BRD, Created a wireframe, Set up your development environment, Organised your project structure, Run your first program
You are now ready to move to the next stage of development
Checkpoint
Next-Lab Preparation
Git Push
git push origin branchNameTopic : Working with a Text and Listin HTML
1) Power of HTML text tags
2) Customizing your style with CSS
3) Listing it right using HTML
4) HTML Link up , attributes of tag, block vs inline elements
Text box Width : 887
Business Scenario, Pre-lab Preparation, Next-lab Preparation, Task, Activity, Checkpoint : 90%.
Steps : 1,2,3 [Sub Steps - a,b,c]
Normal Text, Topic Name : 80%
Subtopic : 70%
Code Box font Size : 16px
By Content ITV


